You can use 4aGoodCause as a place to store donation records from all sources, both online and offline donations. Follow this guide to import donations from other sources into 4aGoodCause.
Get your data ready for import
You can import donation records from a CSV file. CSV is a simple file format used to store tabular data, such as a spreadsheet or database. Files in the CSV format can be imported to and exported from programs that store data in tables, such as Microsoft Excel or OpenOffice Calc. CSV stands for "comma-separated values".
So, first, gather your donations into a spreadsheet such as Excel. Then save the file as a CSV file. That is the file you'll use in the steps below.
What donation information can you import?
Use this guide to help you set up the columns in your spreadsheet. You'll map these fields to the data in your import file. You can include column headers in your spreadsheet or not. They are not required.
Available fields for your donation import include the following. Required fields are in bold.
First Name
Last Name
Address 1
Address 2
City
State
Zip Code
Country
Phone
Email
Newsletter Subscriber (True or False - are they on your email list or not)
Total (total amount of the donation - 100, 100.00, $100, $100.00)
Frequency (one-time, recurring)
Transaction Date (mm/dd/yyyy)
Transaction ID
Transaction Description (any notes or comments about the donation)
Subscription ID
Payment Method Type (credit card, echeck, invoice, no charge, offline )
Payment Card Type (visa, mastercard, discover, american express)
Gift Designation (specific purpose or fund the gift is designated for. Leave blank or skip to have donation noted as Unrestricted)
Campaign (Assign the donation to a campaign in 4aGoodCause by matching the exact name of that campaign as it appears in 4aGoodCause. Leave blank or skip this field to import the donation as Unassigned).
Steps to import your donations
Follow these steps to import your contact into 4aGoodCause.
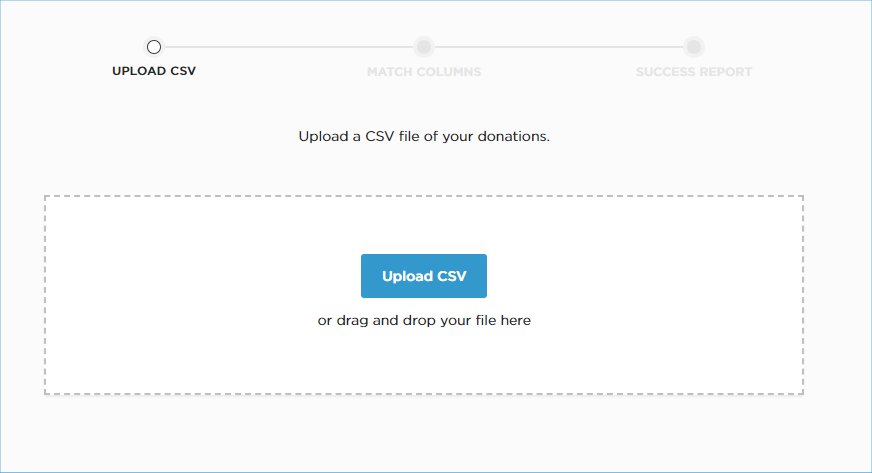
Step 1- Uploading your file
Login to https://4agc.com as a Nonprofit User.
Click on Donations on the left menu.
Click on Import.
Click on Upload CSV. You will be prompted to find your CSV file on your computer.
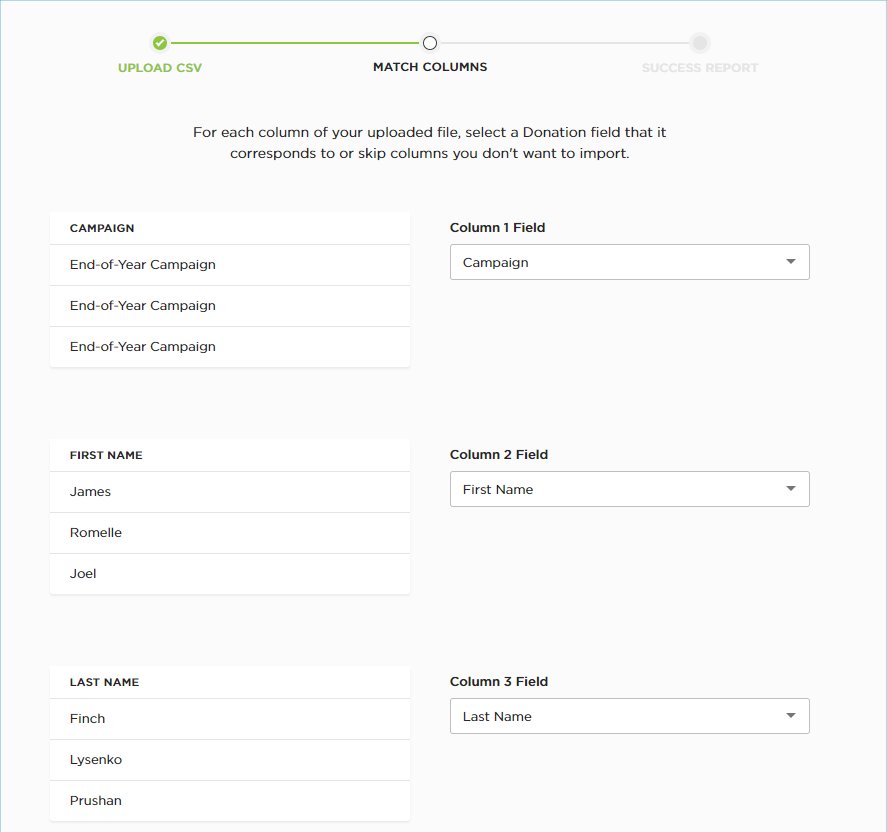
Step 2 - Mapping your fields
Once you have selected your file will be uploaded to 4aGoodCause.
You will be moved to a page where you can match the columns in your file to the available fields in 4aGoodCause.
Choose a 4aGoodCause field on the right (select from the dropdown menu) that matches the data on the left (a column from your file). Feel free to skip any data column you don't want to import by selecting Skip Field.
Once you have your data mapped to 4aGoodCause click Finish Adding Donations. This will upload your donations to your 4aGoodCause database. Be sure to double-check your data mapping before clicking this button. There is no undo.
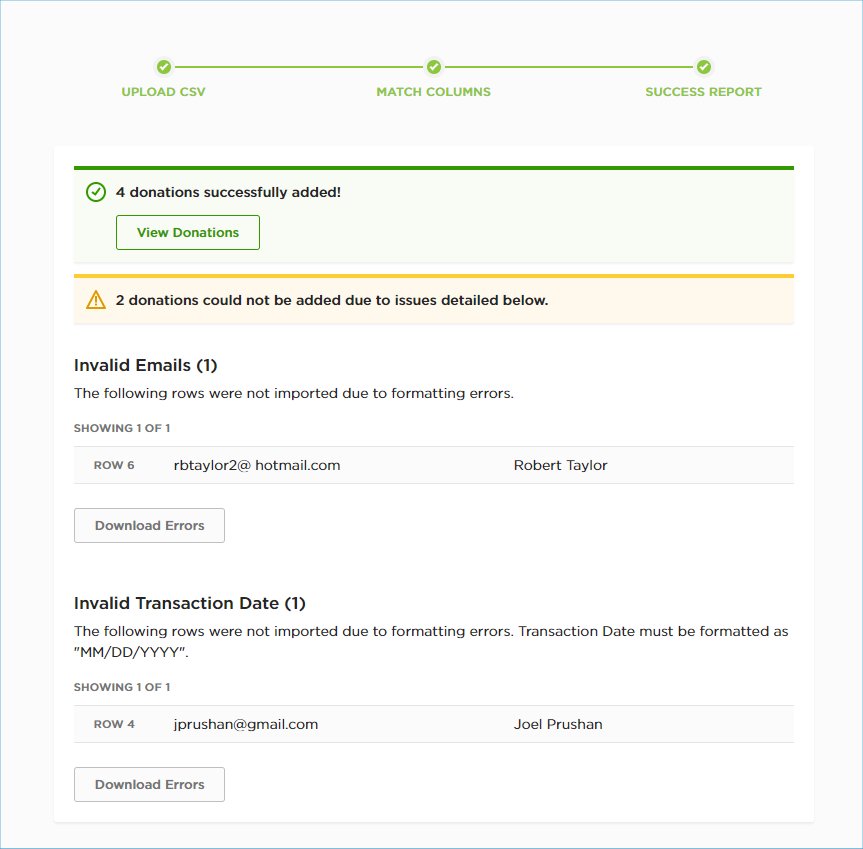
Step 3 - See your results
You are now on a page where you can view the results of your import.
You will see how many donations from your file were successfully imported. This will be noted in green.
You may also see a message about donations that were not imported (noted in yellow). This can be due to data not being properly formatted (invalid emails for example).
If you have errors you can download a CSV that includes only those affected records, make corrections, and run a new import. Each error category contains a separate error download with the records affected by that specific error. Click Download Errors to receive that data.